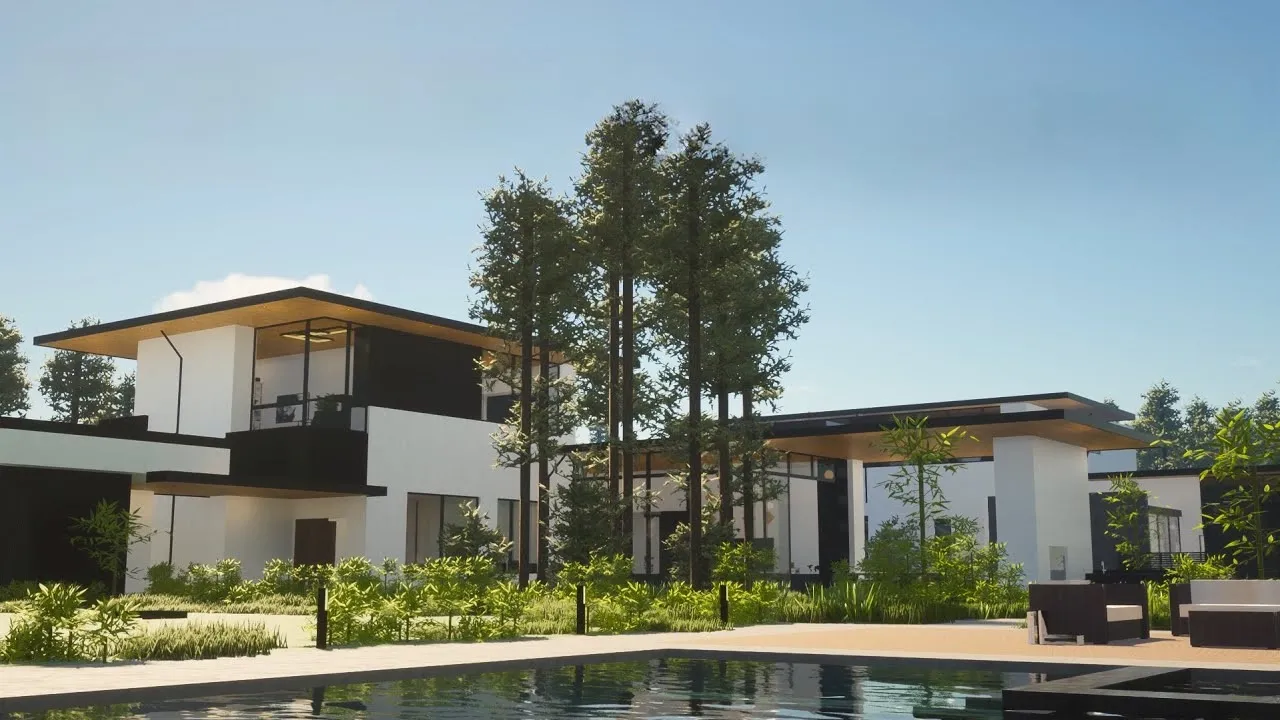
Minecraft’s iconic blocky look has always held a special place in gamers’ hearts—but what if you could keep that core magic and completely overhaul the visuals into something that looks like it came out of a next-gen title? You can.
With the right blend of shaders, texture packs, and mods, you can turn your Minecraft world into a jaw-dropping, ultra-realistic experience that pushes the boundaries of what the game engine can do.
In this guide, we’ll take you through everything you need to know to achieve a photorealistic look in Minecraft, using three powerful tools: SEUS PTGI HRR 2.1 by Sonic Ether, the Ultimate Immersion texture pack, and the Ultimate Immersion mod. By the end, your Minecraft world will look less like a retro sandbox and more like a AAA visual showcase.
Table of Contents
Why Go Realistic?
Minecraft’s nostalgic charm is undeniable, but let’s face it—its default visuals are starting to show their age. Realistic shaders introduce dynamic light behavior, shadows, and reflections, while high-res textures add stunning detail to every surface. With mods catching up to modern graphics standards, even players with mid-range PCs can now enjoy breathtaking visuals with ease.
What You’ll Need First
Before diving into installation, make sure your setup meets the following:
- Minecraft Java Edition: This guide is based on Java Edition (1.16.5 and above).
- A capable PC: At least a GTX 1660 GPU and 8GB of RAM are recommended.
- Forge or Fabric: Required mod loaders.
- OptiFine: Needed for shaders and advanced visual settings.
Let’s now break down the three main components that will bring your realistic Minecraft dreams to life.
Step 1: Bring Light to Life with SEUS PTGI HRR 2.1
What Is It?
Sonic Ether’s SEUS PTGI HRR 2.1 is a next-level shader pack that introduces realistic, path-traced lighting into Minecraft. It simulates the behavior of real-world light—think soft ambient shadows, glowing sunlight, and perfect reflections—all without requiring RTX hardware.
Installation:
- Install OptiFine
- Go to optifine.net and download the version that matches your game.
- Run the
.jarfile and hit “Install.” Launch the game using the new OptiFine profile.
- Download the Shader
- Head over to Sonic Ether’s website or Patreon.
- Grab the latest version of SEUS PTGI HRR 2.1.
- Install and Activate
- Launch Minecraft with the OptiFine profile.
- Navigate to Options > Video Settings > Shaders and click “Shaders Folder.”
- Move the shader ZIP into this folder, then go back and activate it.
- Fine-Tune Settings
- Inside the shader options, tweak values like Ray Trace Distance or Godrays to balance visuals and performance.
Pro Tip:
Lower your render distance to 8-12 chunks and try windowed mode first for smoother gameplay.
Step 2: Upgrade Textures with the Ultimate Immersion Pack
What Is It?
The Ultimate Immersion texture pack reimagines Minecraft’s visuals with photorealistic textures, using Physically-Based Rendering (PBR). Blocks and items gain depth, reflectivity, and material-specific shine, offering a stunning visual upgrade.
Installation:
- Download the Pack
- Get it from eso-ui.com or the Ultimate Immersion Patreon.
- Choose a resolution that suits your PC—512x for mid-tier, 2048x for high-end systems.
- Activate in Minecraft
- Open the game with OptiFine.
- Go to Options > Resource Packs and open the pack folder.
- Move the ZIP file there, then select it in the menu.
- Enhance Visuals
- Enable Connected Textures (under Video Settings > Quality) for smoother transitions.
- Pair it with the Ultimate Immersion mod for the full experience.
Pro Tip:
Start with 512x if you’re unsure of your hardware’s limits. You can always upscale later!
Step 3: Add Realistic Objects with the Ultimate Immersion Mod
What Is It?
This mod brings 400+ new building elements to Minecraft—from furniture and glass panes to modern lighting and modular structures. It’s designed specifically to work with the Ultimate Immersion texture pack, making your builds look like real-world architecture.
Installation:
- Install Forge
- Visit files.minecraftforge.net and download the installer for your Minecraft version.
- Run the installer and select “Install Client.”
- Download the Mod
- Get the compatible version from eso-ui.com or the mod’s Patreon page.
- Add the Mod to Minecraft
- Navigate to your
.minecraftfolder (%appdata%\.minecrafton Windows). - Create or open the
modsfolder and place the.jarfile inside. - Launch Minecraft using the Forge profile.
- Navigate to your
- Verify and Sync
- Make sure both the texture pack and the mod are loaded. Otherwise, missing textures may appear pink or black.
Pro Tip:
Disable Geometry Ray Tracing in the shader settings to remove shadow glitches with custom models.
Final Touches: Smooth Performance & Immersion
Performance Tweaks:
- Increase RAM: In the launcher settings, set JVM arguments to
-Xmx8Gor more. - Adjust Render Distance: Keep it low (8 chunks) to start, then scale up if performance allows.
- Use Alternatives: If SEUS PTGI is too demanding, try SEUS Renewed or BSL Shaders as lightweight options.
Explore the New World:
- Create a new world or download pre-built modern maps.
- Test the shaders at sunrise, build with realistic furniture, and explore every corner with cinematic visuals.
- Capture screenshots—your world will look like it belongs in a portfolio.
Conclusion
Upgrading Minecraft to ultra-realistic visuals in 2025 is not only possible—it’s surprisingly accessible. With SEUS PTGI HRR 2.1 for lighting, the Ultimate Immersion texture pack for photorealism, and the Ultimate Immersion mod for next-gen building components, your blocky sandbox becomes a visual powerhouse. Whether you’re designing futuristic mansions or just wandering through forests bathed in realistic sunlight, this transformation will breathe new life into your Minecraft adventures.
Ready to experience Minecraft like never before? Let’s build a world that feels real.

