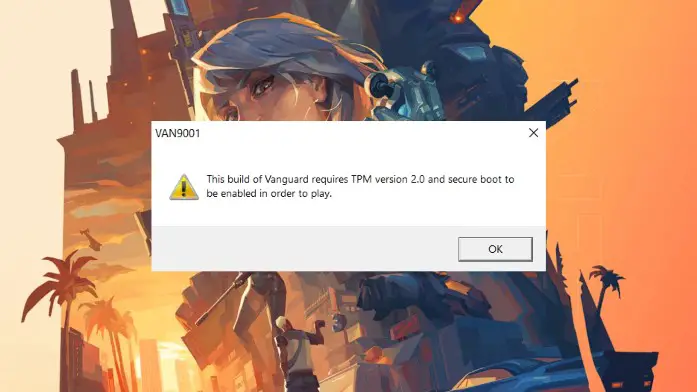
The gaming community was buzzing with excitement when Windows 11 was released, bringing with it a range of new features and improvements. However, some Windows 11 users who are also fans of VALORANT found themselves facing an unexpected roadblock.
When attempting to launch VALORANT, they encountered a perplexing error message that demanded TPM 2.0 and Secure Boot to be enabled to play. Coupled with an error code, van 1067, this issue left many gamers frustrated and wondering how to get back into the game they loved.
Fortunately, there is a solution, though it involves navigating the BIOS settings of your computer. In this article, we will provide you with a comprehensive guide on how to fix the VALORANT Windows 11 TPM 2.0 error.
Table of Contents
Here is the Way to Fix VALORANT Windows 11 TPM 2.0 Error?
Step 1: Restart Your Computer and Access the BIOS
- Restart your computer, making sure no other programs are running.
- To access the BIOS, you need to press a specific key during startup. The key varies based on your PC’s brand. Common keys include F2, Delete, F10, F12, or F1. You can find the right key in your PC’s manual or by searching online.
- When you press the correct key, your computer will enter the BIOS.
- Some PCs have an advanced mode, which you can access by pressing a particular key (like F7). This might be needed for some steps, especially for ASUS PCs.
Step 2: Enable TPM 2.0 and Secure Boot
- Look for the “Secure Boot” option in the BIOS. It’s often found in the Boot Options or Security tab, but the location can differ.
- Depending on your BIOS, you might need to change “Secure Boot” from “Custom” to “Standard” or simply turn it on. The wording can vary, so pay attention to your BIOS options.
- Some BIOS setups let you specify that your operating system is UEFI compatible. If this option is available, ensure it’s set correctly.
Step 3: Save Changes and Restart
- After adjusting your BIOS settings, save them before leaving the BIOS interface. Usually, you can save changes by pressing a key like F10.
- Let your computer restart.
Step 4: Verify Your BIOS Settings
- Once Windows starts up, open the Run dialogue box by pressing the Windows key and “R” key together.
- In the Run box, type “msinfo32” and press Enter.
- The System Information window will open. On the right side, look for “BIOS Mode” – it should say “UEFI.”
- Scroll down to find “Secure Boot State” – it should be set to “On.”
Disclaimer: Before you proceed with any changes in your computer’s BIOS, it is essential to exercise caution. Incorrect adjustments to BIOS settings can potentially render your PC unbootable or lead to data loss. It is advisable to note down any values you modify so that you can revert to them if necessary.
Conclusion
By following these comprehensive steps, you should be able to successfully resolve the VALORANT Windows 11 TPM 2.0 error and regain access to your favourite game. However, it’s important to approach changes in your computer’s BIOS with caution, as these settings are integral to the proper functioning of your PC.
If you encounter any difficulties or if the provided steps do not resolve the issue for your specific PC, consider seeking assistance from a knowledgeable friend or consulting your PC’s manufacturer for guidance. Happy gaming!


![How to Play Valorant Smoothly on UHD 620 GPU [120 FPS Guaranteed] Play Valorant Smoothly on UHD 620](https://techynicky.com/wp-content/uploads/2023/05/Play-Valorant-Smoothly-on-UHD-620-218x150.jpg)
